Showing posts with label DIY. Show all posts

DIY Hair flowers to perfect your pin up

Hair flowers have always been a great way for me to style my hair and just finish off a look but I've also always been one of those girls that would rather spend my hard earned money on a new piece of clothing to add to my wardrobe than to buy accessories such as earrings, bangles and hair flowers. Since I need a good solutions for this problem and since I don't always find good hair flowers in the right size or with the right colours I decided to make them myself. 

Making your own isn't that hard so it doesn't really require you to be quite the handy woman. It is a great way to be creative and match the pieces to the clothes that you already own or to create some diversity into your up dos. It takes a bit of time and getting used to but once you get the hang of it you'll be done in no time.
All you need for them is:

- Bobby pins, single/double pronged clip or duckbill clips depending on your personal preference and style you wish to go for
- Fake flowers and petals of all sorts
- Felt
- Glue, I prefer to go for a heavy duty glue that is water resistant so there is no risk of that they will fall apart after a few uses or a hot glue gun, which I sadly don't own yet.
- Precision cutter or scissors
- Wire cutter
I just bought a new bouquet of fake flowers so I started of with cutting all the flowers from the wired stems and sorting them in bags so I can store them easily later on in my box, I like to be very organized when it comes to these things, and I left out some petals and a rose. 
To start with choose the size and desired clip. I choose a double pronged clip since I like the stability that they provide for the felt and flowers. 
To make a good base for the flowers to be glued on you'll need the felt. I choose green since this, in my opinion of course, best represents the stem and leaves of an actual flower. You'll need to cut two circles or other geometric shapes out of the felt depending on how big and what shape your piece will be. I went with rectangles that are close the size and shape of the clip itself.

Place one of the felt rectangles between the clip and add glue in the center of the felt also covering the clip. Place the second rectangle on top of the first so the clip is glued in between them. 

This will your base to glue the flowers on. 
Since most fake flowers come with a fake stem, you'll have to remove it. You can't glue this on a clip with much stability unless you use a glue gun. Don't throw away these plastic bits yet since you can also use parts of this for stability and to make sure the flower has the desired shape. If there is no way for you to glue the flower on without it loosing its shape then you can also glue a small piece of felt on the flower and then glue this piece on the clip so it has a firm base for the glue to hold on to.
I actually took apart the entire rose and glued it back together piece by piece. I did this because there were several heavy plastic pieces between the petals that I didn't want to use. I also chose to wait a few hours halfway the process of putting it back together so that the glue had enough time to dry and harden. 

I usually choose the colours and flowers that I want to use up front but make my composition as I go but you could do it differently of course. 
When you're done clip the beautiful piece that you just made on a piece of cardboard so it can stay upright until it is completely dry and ready for use. I usually wait around 12-24 hours to use it. 

Voila, your own unique hair flower made with love! 

Miss Kitty Heart is on:

My retro kitchen

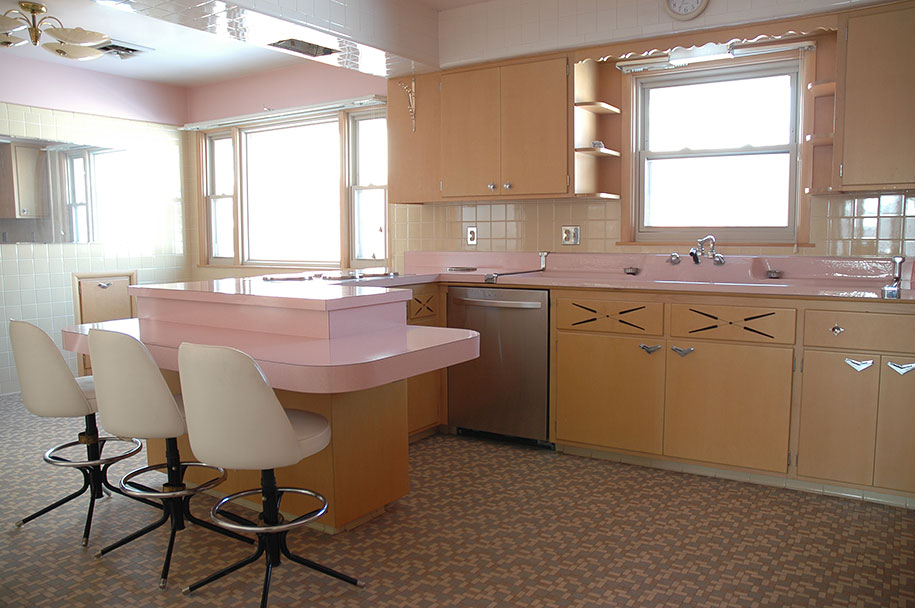
My big dream is to have an entirely vintage inspired retro kitchen. In our current apartment I can't really choose my kitchen cabinets but that isn't going to stop me from trying to decorate the rest of my kitchen as vintage as possible, with a twist of my own. 

Just to show you what I understand as "vintage kitchen" let me show you some pictures that I scrambled of the internet. For me it's all about combining white or grey (neutral colors) with bright colors such as blue, red, orange and pink and items from specific time periods. 


First I though of what colors I wanted, the color that immediately pops. For me this was orange or red but scientifically red isn't an appealing color to have in a room where you have to eat. It reduces your hunger feeling so I chose orange. Even though orange furniture is more difficult to find than red it didn't stop me. 

I have two other things which I had to account for. First was the budget and second was the fact that I can't get chairs with leather seatings. My cats just love to scratch those. After searching websites for a long time I finally chose all my new furniture and got this result after a lot of blood, sweat and tears. Putting furniture together isn't my strong point, the blood and sweat is quite literally. I got quite a lot of cuts from screwdrivers, wood and cardboard. And to tell you a little secret.. it's all Ikea... 

I took these pictures when I got home from work and it's already quite dark then. The kitchen table is usually my workspace for blogging, cosplay research and drawing. Always being accompanied by my lovely cats. This time Happy was on guard duty.
Excuse the ugly litterbox next to the cabinet. I love the orange cross in this cabinet to store wine. It looks so fancy and expensive.
It still needs a lot of finishing touches. We're planning on painting the biggest part of the kitchen orange and a light grey and also hanging wallpaper with orange and grey stripes. I'm still figuring out the color combinations. 

As far as decoration goes I got my CD player replaced by a modern record player with a retro look. It packs a CD player, usb port, bluetooth, FM/AM radio but most importantly a record player so we can finally swing in our kitchen.

My in laws got me a gorgeous lamp that still has to be installed, but it's the exact same color orange as the chairs and made from good old 60's hard plastic. I still need some more wall decorations with a hint to a fifties diner and kitchen utensils that just scream vintage. I'm totally in love with these from SMEG, Brabantia and Russel Hobbs. 


And one day I'll get a gorgeous English stove to cook on. 


Miss Kitty Heart is on:

Retro cabinet DIY


My goal is to have a vintage/retro house and I try lots of different things to really give it that feel. But first let me explain the difference between retro and vintage. These terms get mixed up a lot but there is a difference. 
Retro is used for things that are brand new but have that vibe from the '20s - '80s stuff. It's designed to look old but is isn't old. Retro things and furniture are awesome because it's a good way to buy furniture and other things without having to worry about it's going to hold up or how long it's going to last when being used. 
Vintage is the real deal. It's the term being used for furniture, clothes, kitchen utensils from the actual '20s - '80s. It's most of the time quite hard to find, rusty and expensive. I do love these items as well. Especially the furniture and some kitchen utensils. 

I found this cute wooden retro cabinet in a store for about €17 and I couldn't resist to bring it home. It's not big but the thing that bothered me the most about it was the color. I love the white but the wood just wasn't my thing. It didn't really fit the other wooden cabinets that I already have in my kitchen but still bought it with the idea of painting it. 

What do you need to make this boring wooden cabinet fit into your house?

Cats were not included with this cabinet ;)
- The cabinet itself. Broken apart into as many pieces as possible. I screwed off the legs and removed the drawers. I couldn't remove the handles. The screw on the inside was just for show.


- Cloth and plastic bags to protect your floor. I have a wooden floor so I had to be really careful. 
- Enamel paint for wood. 
- A paint roller
- Two paint brushes
- A container
- Paper towels
- Green rough sponge
- Painters tape

To start off place the plastic bags and cloth on the floor and place the element of the cabinet on them. 
Get your painters tape and start taping off all the side that you don't want paint on. Watch out though there is no guarantee that there won't be any paint on after all.. 
After everything is taped, open the paint cans, make sure you choose a kind of paint that is fit for wood. I choose petrol blue and white for this cabinet since it's going to stand in our living room and our sofa is also petrol blue. It already went horrible wrong when opening the cans since I put to much force on it and paint already went everywhere.. (luckily I covered my white table with plastic) Pour some of the paint for the largest surface in the container and time to start rolling.

I didn't take any pictures while I was painting since I am a very messy painter and my hand where covered in blue and white paint and I wanted my camera to stay black. 
I used a large roller for the side of the cabinet and a brush for the drawers. I painted the drawers on the inside as well. 

The paint takes about three hours to dry but I removed the tape after 1,5 hours to check out the borders. As I said before, the tape doesn't guarantee a clean edge... I used a rough sponge to rub of the blue paint on the edges where there wasn't supposed to be blue paint. 

This is the final result! What do you guys think? Would you ever do this yourself of would you just search for that perfect cabinet in the right color immediately? 


Coffee & Ink is on: